If you are a beginner in WordPress and facing some glitches in adding or creating a custom menu then this step by step guide will help you in solving the problem.
Steps to Create a Custom Menu Structure in WordPress
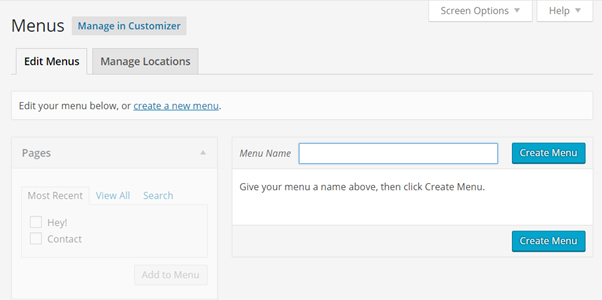
- You need to enter your WordPress dashboard. ClickAppearance and then Menus. Provide a name for your menu in the Menu Name field and then click the Create Menu button.
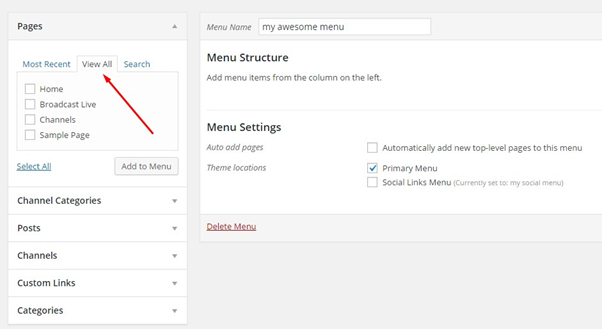
- Start adding navigation menu items to create customized menu structure. It is called customized because you can customize the menu name.
Next, you need to click Pages and View All. You can select the boxes for the pages that you want in your menu.
- If you want to switch the order of your menu items, you can simply drag and drop them in the desired location to customize navigation bar in WordPress.
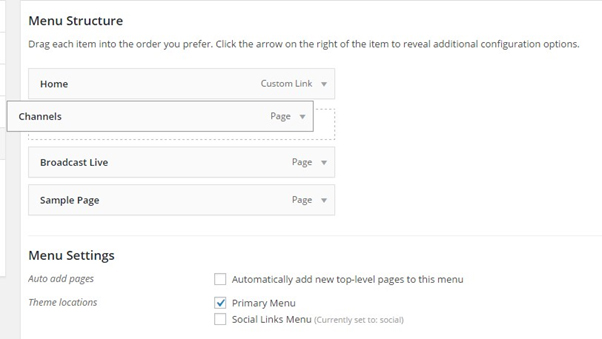
- You can also organize sub-menus by dragging a menu item to the right of parent menu item.
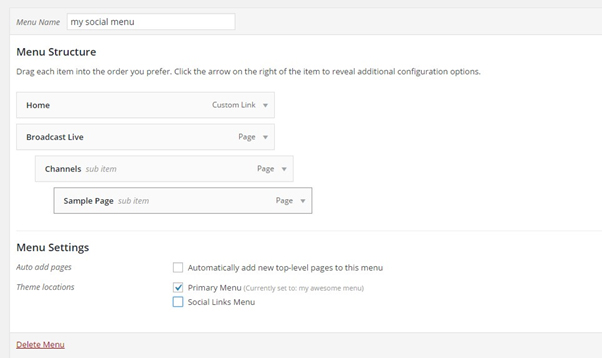
If you want to add sub categories under main menus in the WordPress then you simply have to drag the sub menu option which you like to put under the main/parent menu hierarchy, making it slightly right aligned.
These are the steps you can follow to create custom menu structure on WordPress. However, you must also remember not to populate any parent category with too many SEO keyword based sub categories to rank on google.


Mohammad Mohsin is a Web Consultant who writes about UI/UX experiences, Digital Marketing, New Web Trends and Leadership Skills. At M&M Web Solutions he leads an extremely talented team of Designers, Front-end and Back-end Developers who help to deliver online business solutions to startups, small business and large corporates across the globe.
You can connect with Mohammad Mohsin on LinkedIn
You can connect with Mohammad Mohsin on LinkedIn