Navigation menus are customizable menus in your theme that allow users to add pages, posts, categories, and URLs to the menu. You would like to style your navigation menus to change their appearance to suit your site.
You need to edit your WordPress theme files. If you want to change CSS without changing your theme files, you can see the steps given below on how to add custom CSS using theme customizer:
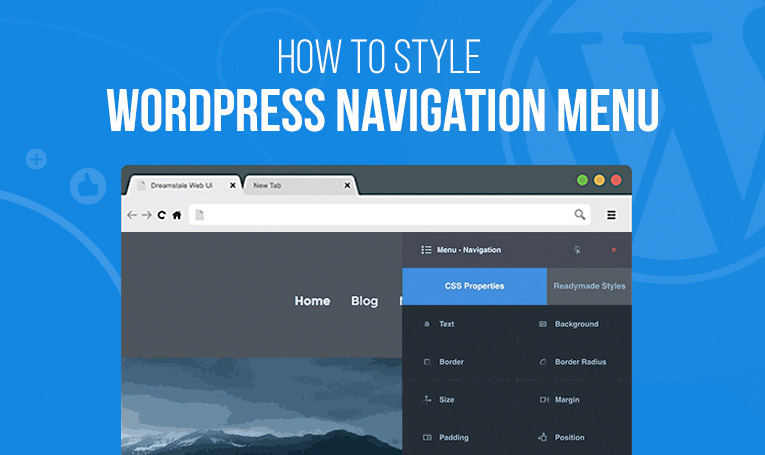
Here is a Complete Step by Step Tutorial Guide To Style WordPress Menu
-
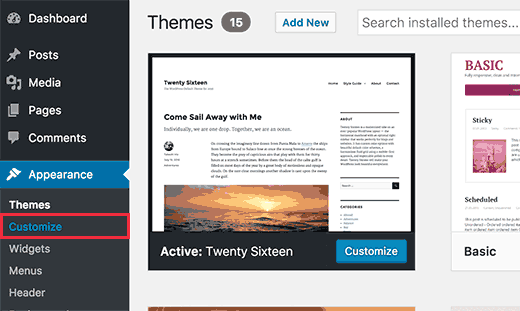
1. You need to go to Themes > Customize page that will open the WordPress theme customizer interface.
-
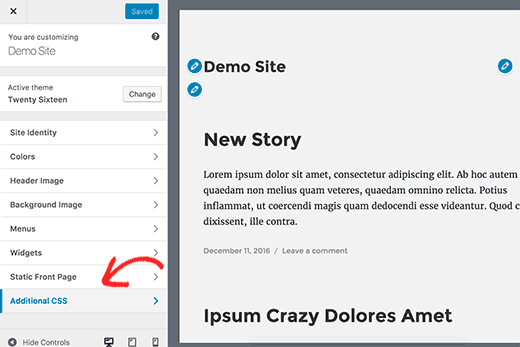
2. You will see your site’s live preview along with many options on the left sidebar. Click the Additional CSS tab from the left sidebar.
-
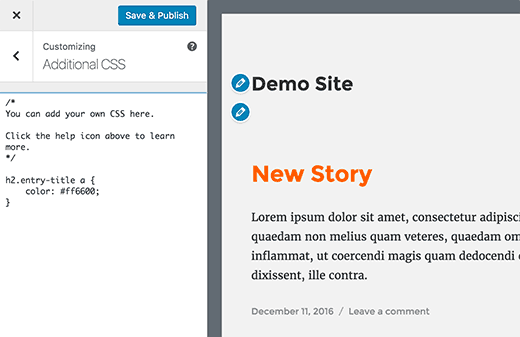
3. You will see a box in which you can add your custom CSS. When you add a valid CSS rule, you will see it replicated on site’s live preview. After you have added and checked how custom CSS code looks on your site, click the Save & Publish button.
You need to define CSS class and menu location, Your WordPress theme might already be doing that by adding the navigation menus using code similar to the one shown below:
<?php

  wp_nav_menu( array(

  'theme_location' => 'primary',

  'menu_class'     => 'primary-menu',

  ) );

?>
Through this code, WordPress knows the location where the theme displays primary menu. Using the following CSS structure as mentioned below you can do stylizing a navigation menu with CSS.
.navigation{

  position:  relative;

  z-index:  1000;

  padding:  11px 0 0;

  }

  .nav{

  margin:  0;

  padding:  0;

  }

  .nav li{

  float:  left;

  font-size:  19px;

  line-height:  26px;

  font-weight:  700;

  margin:  0 38px 0 0;

  position:  relative;

  }

  .nav li:last-child{

  margin:  0;

  }

  .nav li a{

  color:  #1d4653;

  display:  block;

  padding:  0 0 27px;

  -webkit-transition:  all 0.3s ease-in-out;

  -moz-transition:  all 0.3s ease-in-out;

  -ms-transition:  all 0.3s ease-in-out;

  -o-transition:  all 0.3s ease-in-out;

  transition:  all 0.3s ease-in-out;

  }

  .nav li a:hover, .nav  li.current_page_item a{

  color:  #009ad1;

  }

  .nav li ul{

  position:  absolute;

  width:  220px;

  top:  53px;

  left:  0;

  background-color:  #FFF;

  border-bottom:  3px solid #009ad1;

  -webkit-box-shadow:  0px 4px 4px 0px rgba(0,0,0,0.20);

  -moz-box-shadow:  0px 4px 4px 0px rgba(0,0,0,0.20);

  box-shadow:  0px 4px 4px 0px rgba(0,0,0,0.20);

  /*         display:  none;*/

  transform:  scaleY(0);

  transform-origin: 0 0 0;

  transition: all 0.3s ease 0s;

  visibility: hidden;

  }

  .nav li:hover ul{

  transform: scale(1);

  visibility: visible;

  }

  .nav li ul li{

  float:  none;

  margin:  0;

  font-size:  16px;

  line-height:  22px;

  font-weight:  600;

  border-top:  1px solid #f0f5f8;

  }

  .nav li ul li a{

  padding:  8px 10px;

  color:  #009ad1;

  }

  .nav li ul li a:hover{

  color:  #faa126;

}
You need to replace #header with the container class or ID used by your WordPress theme. You can completely change the appearance of your navigation menu with the help of this structure.
Apart from that, some classes are automatically added by WordPress to each menu and menu item that allows you to customize your navigation menu further.
<div  class="navigation">

  <a  class="responsive"><span></span></a>

  <?php  wp_nav_menu(

  array(

  'theme_location'  => 'top',

  'container'       => '',

  'container_class'  => false,

  'menu_class'  => 'nav',

  'menu_id'  => 'top-menu' ,

  )  );  ?>

  <div  class="clear"></div>

  </div>
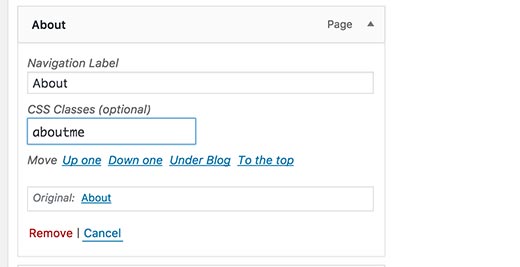
You can also add CSS classes to individual menu items from the admin area. Using this feature, you can add image icons with your menus or change colors to highlight a menu item.
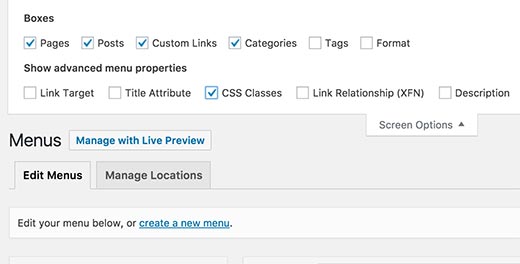
Now, go to Appearance > Menus page and click the Screen Options button.
You need to check the CSS Classes box under the Show advanced menu properties.
When you go to edit each individual menu item, you will see an additional field is added.


You can connect with Mohammad Mohsin on LinkedIn